How to Deploy a MERN Stack application to AWS Amazon EC2
In this blog we`re going to set up a production-ready web server from scratch on the Amazon EC2 (Elastic Compute Cloud) service, then deploy a custom MERN Stack application to it that supports user registration and authentication.
How to Install MongoDB on Ubuntu 20.04/18.04
How to Install NodeJS on Ununtu 18.04/20.04
What is a MERN Stack App, and how does it work?
A MERN Stack framework is made up of a React front-end app that connects to a Node.js + Express + MongoDB backend API, hence the name MERN Stack (MongoDB, Express, React, Node). and we can also use MEAN Stack, which uses an Angular front-end, and the MEVN Stack, which uses Vue.js, which are two other variants of the stack and all are full-stack development.
Scope in this tutorial blog.
This this blog will cover setting up the server on AWS Amazon EC2, as well as deploying and configuring the MERN stack app`s front-end and back-end components to function together.
Check out the following tutorials blog for more details on the React app and Node.js API used in this post:
- Create a new Ubuntu server on AWS EC2
- Connect to Ubuntu EC2 instance via SSH
- Cloning the projects in the ubuntu os in amazon ec2
- Setup server with Node.js + MongoDB in amazon ec2 ubuntu server
- Setup and install all the packages in the clone project in ec2
- Change proxy server in server.js in ubuntu server
- install pm2 and run the pm2 in both server and client in AWS ec2
- Test the MERN Stack app in a browser
Step1: Create a new Ubuntu server on AWS EC2
Before doing anything we need a server that we can work on, follow these steps to spin up a new Ubuntu 18.04 server instance on AWS EC2.
1. Sign in to the AWS Management Console at https://aws.amazon.com/console/. If you don`t have an account yet click the "Create a Free Account" button and follow the prompts.

2. Go to the EC2 Service section.
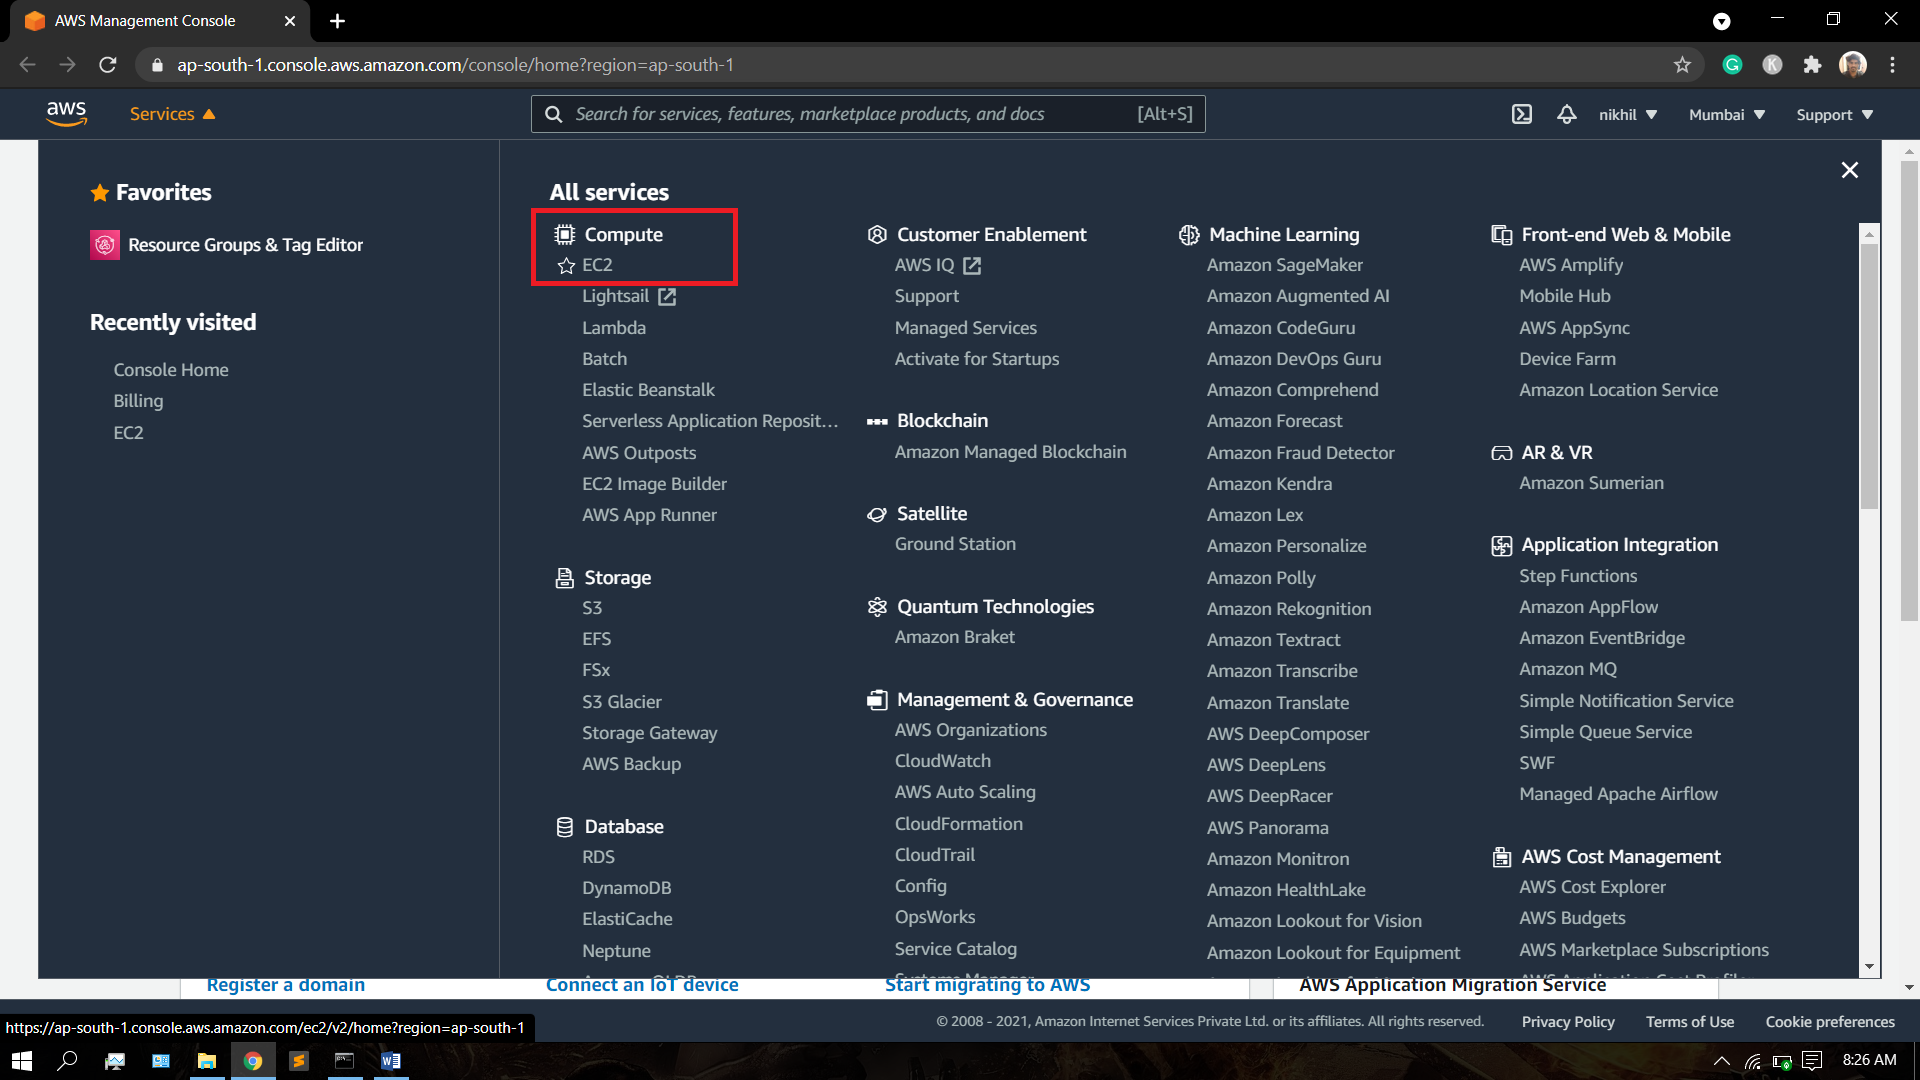
3. Click the "Launch Instance" button.
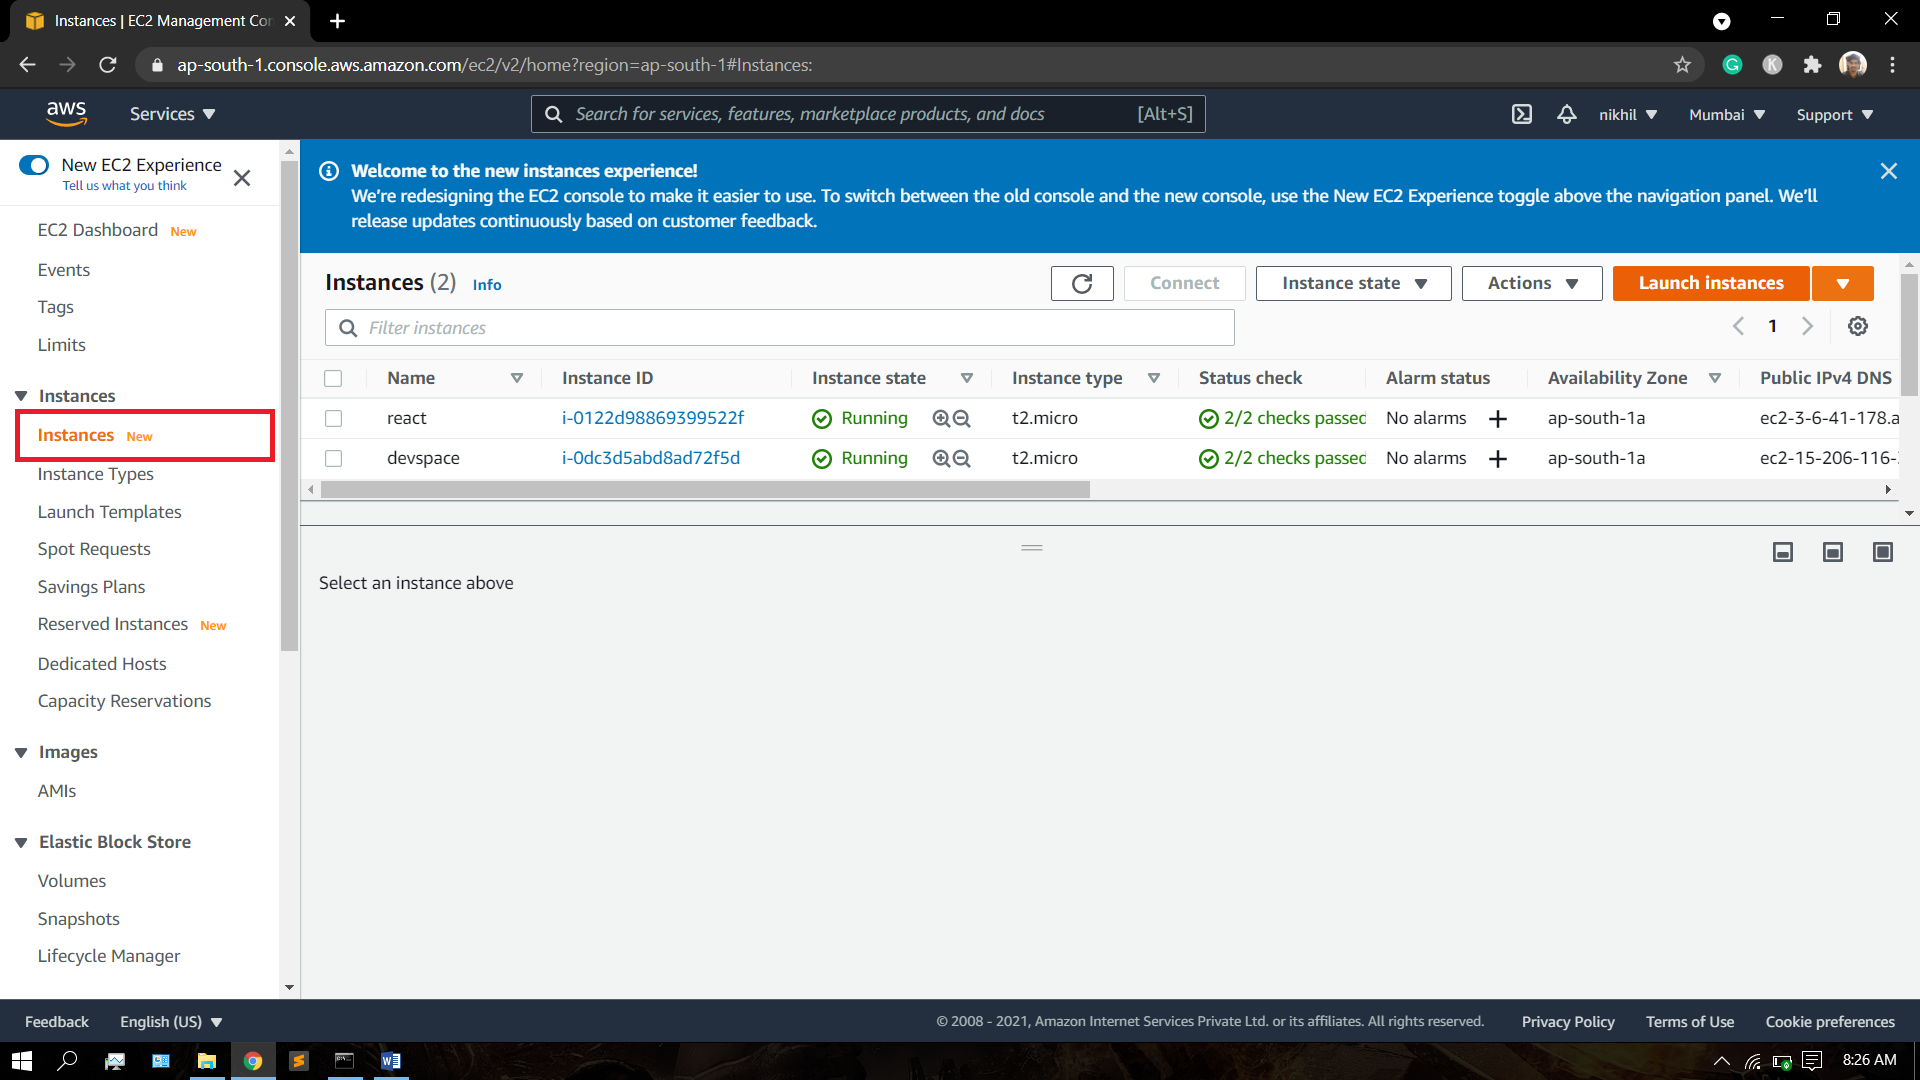
4. Choose AMI - Check the "Free tier only" checkbox, enter "Ubuntu" in the search box, and press enter, then select the "Ubuntu Server 18.04" Amazon Machine Image (AMI).
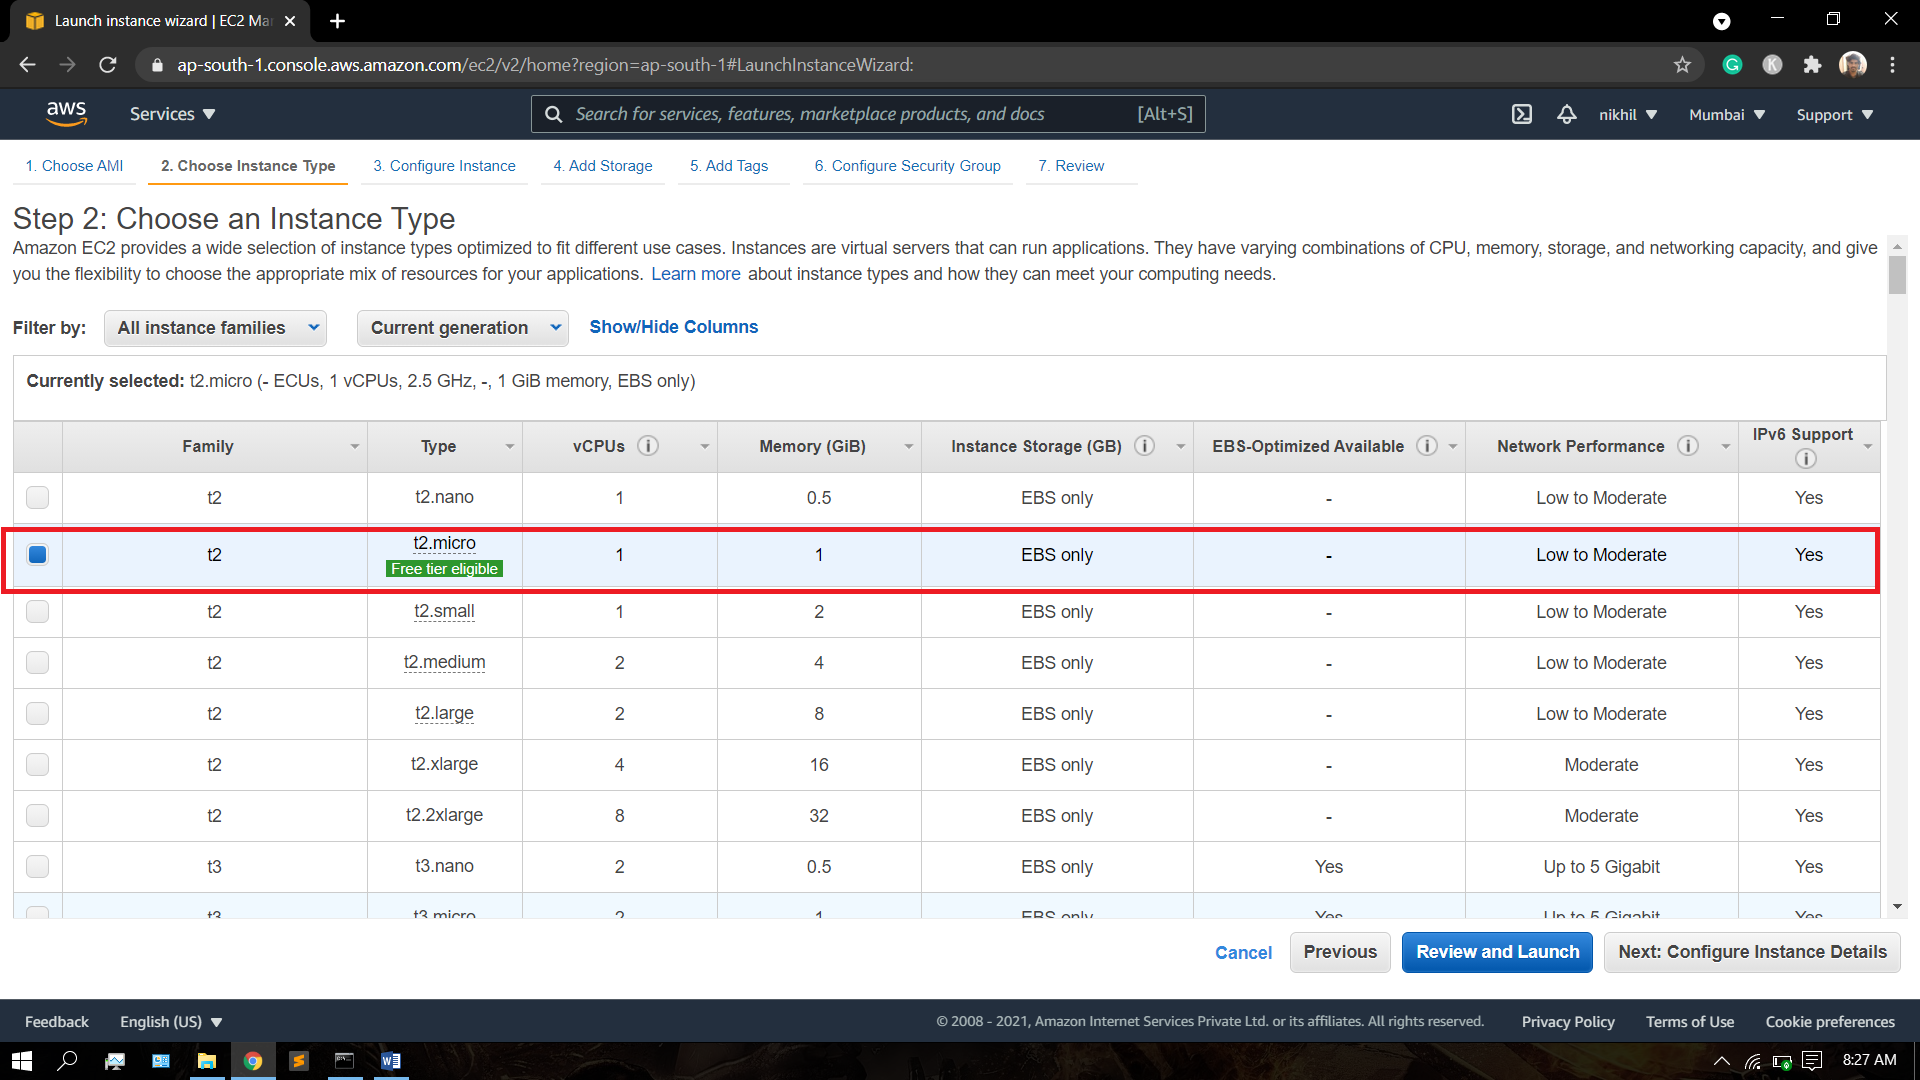
5. Choose Instance Type - Select the "t2.micro" (Free tier eligible) instance type and click "Configure Security Group" in the top menu.
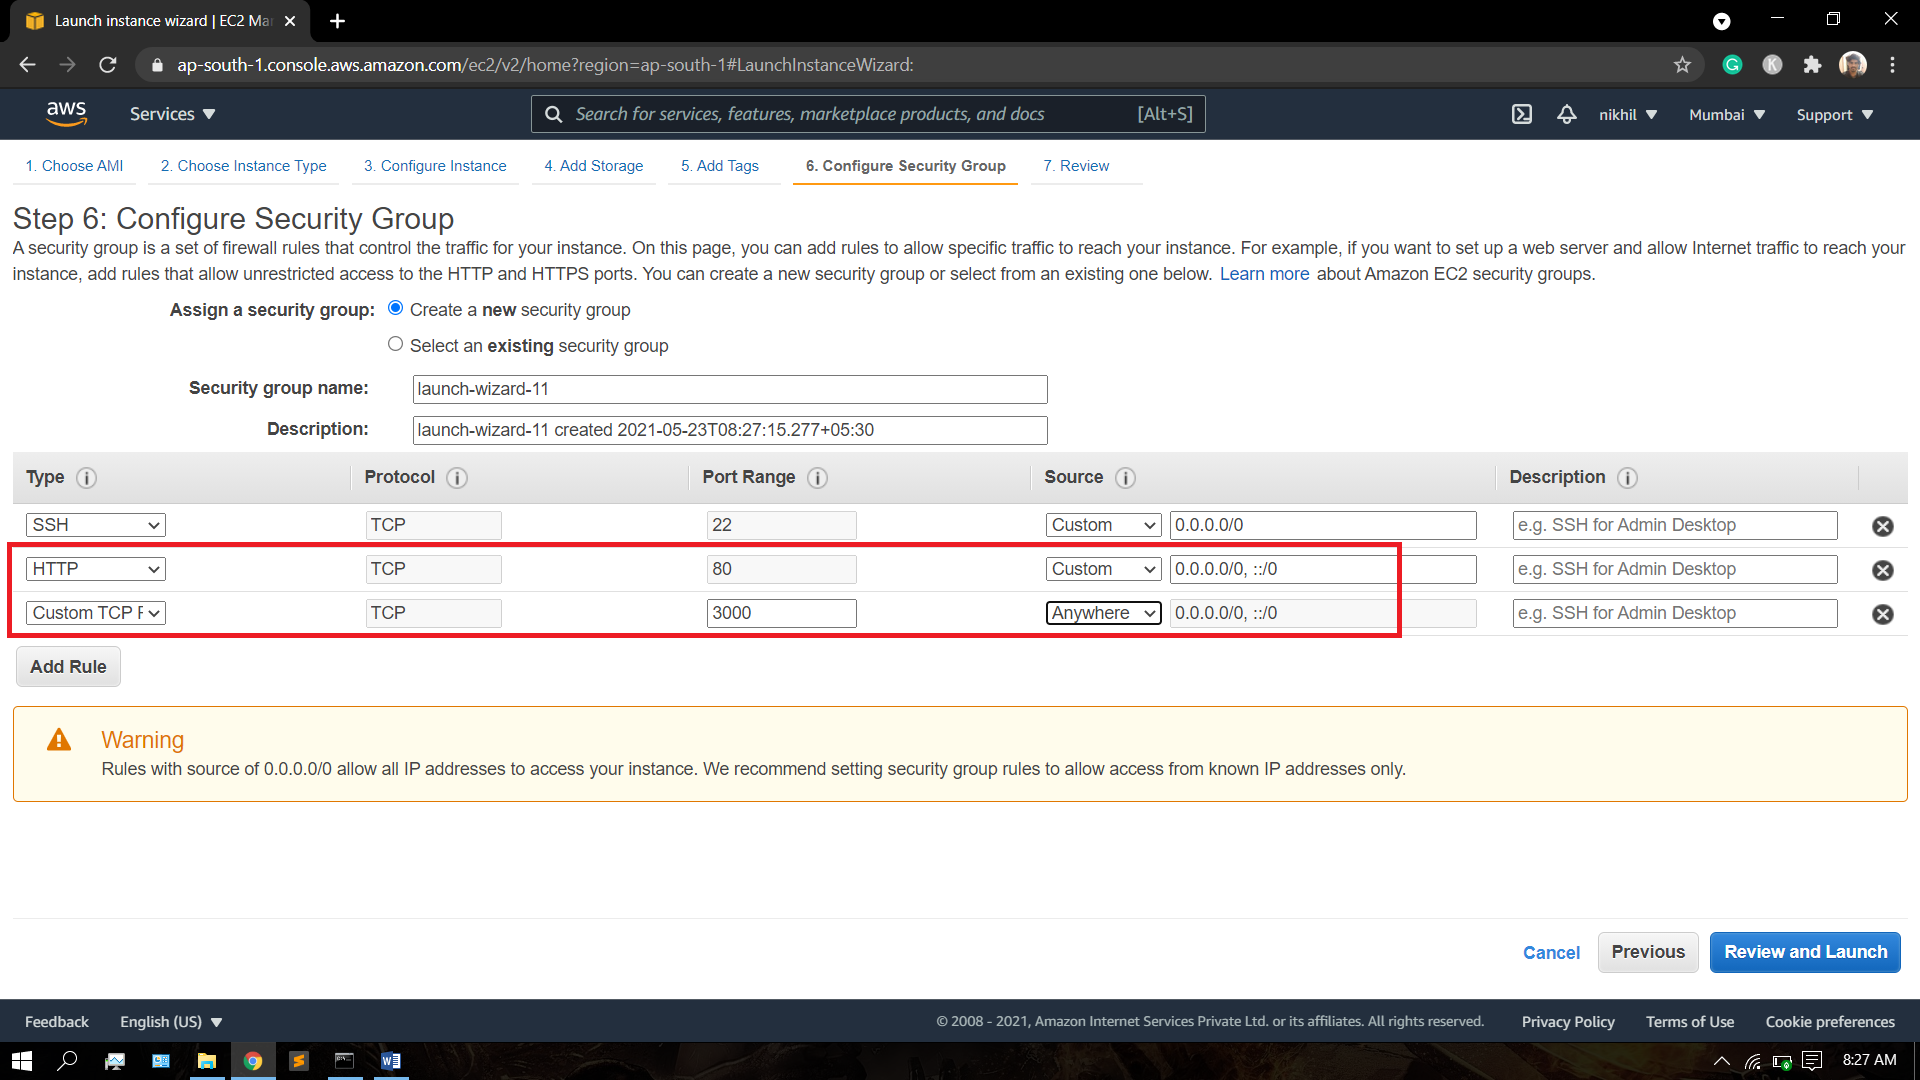
6.Configure Security Group - Add a new rule to allow HTTP traffic then click "Review and Launch".
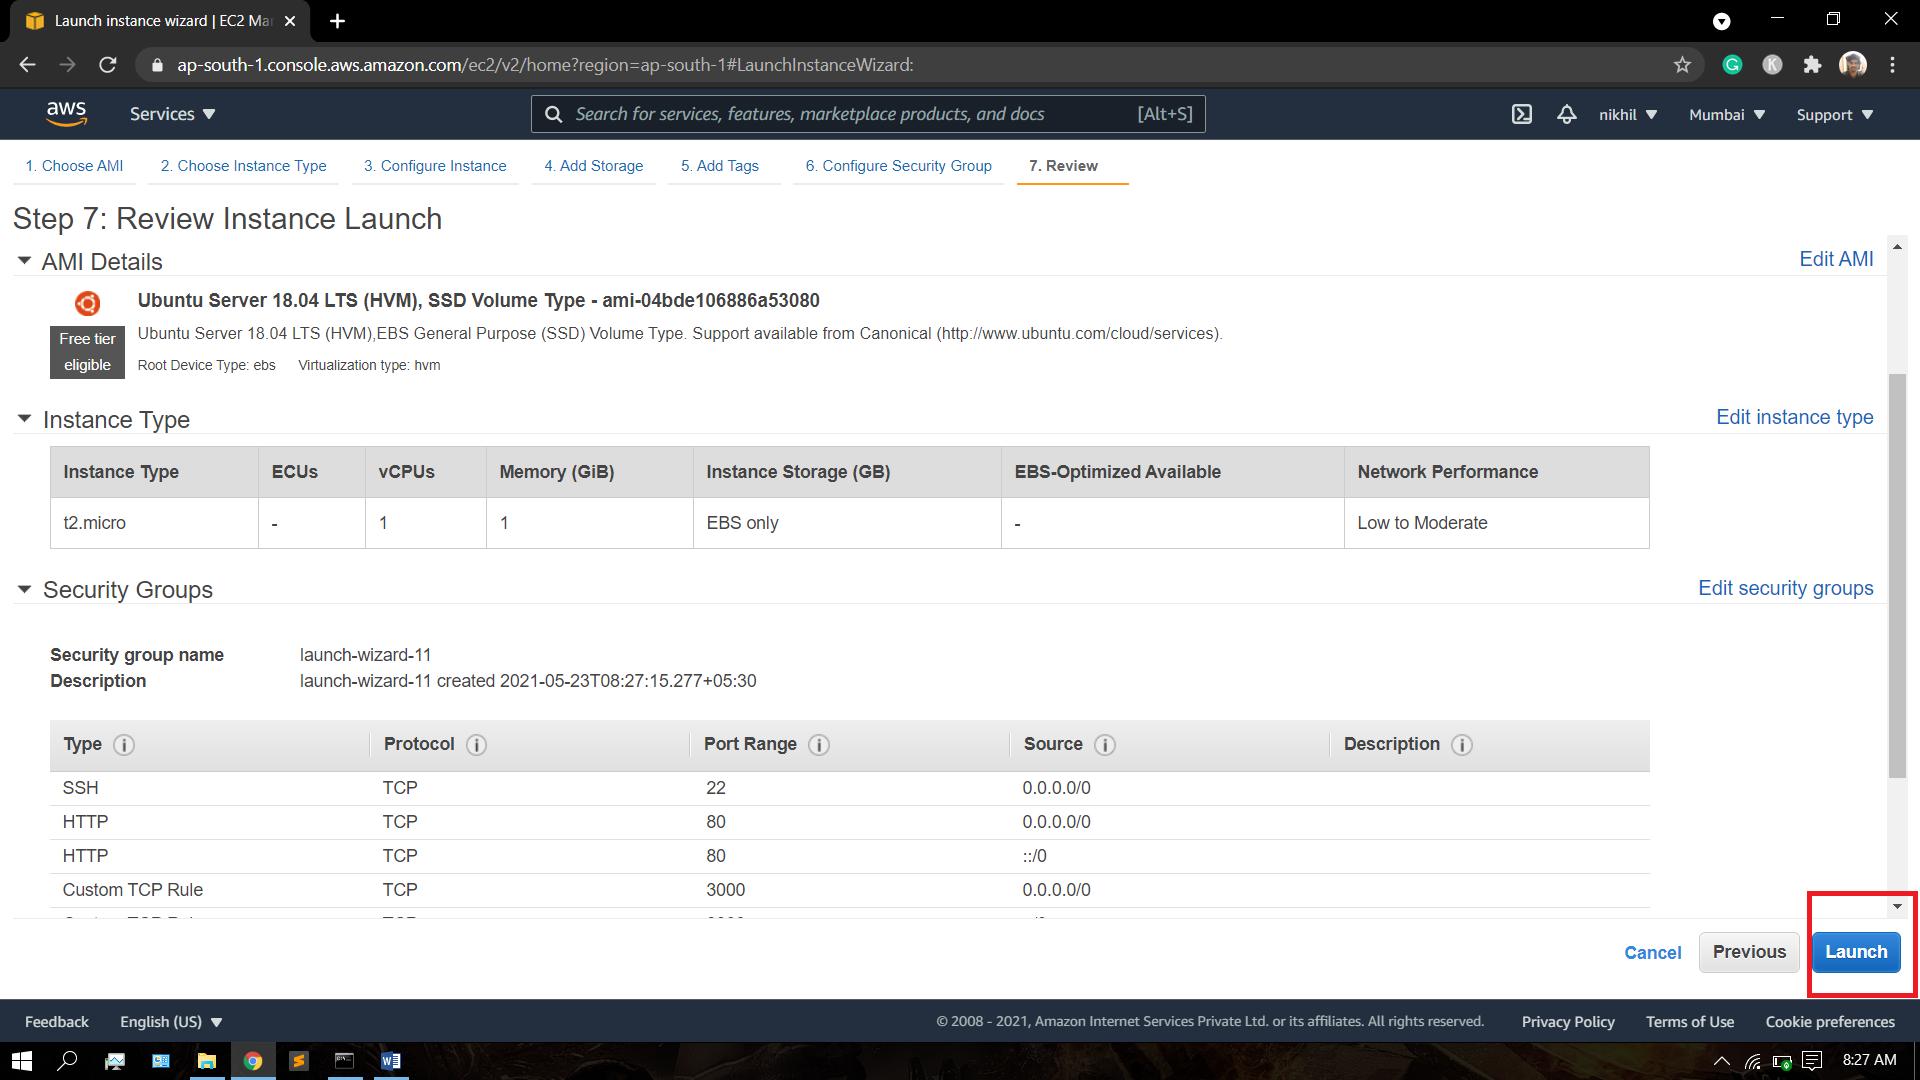
7. Review - Click Launch
8. Select "Create a new key pair", enter a name for the key pair (e.g. "my-aws-key"), and click "Download Key Pair" to download the private key, you will use this to connect to the server via SSH.
9. Click "Launch Instances", then scroll to the bottom of the page and click "View Instances" to see details of the new Ubuntu EC2 instance that is launching.
Step2: Connect to Ubuntu EC2 Instance via SSH
Once the EC2 instance reaches a running state you can connect to it via SSH using the private key downloaded in the previous step.
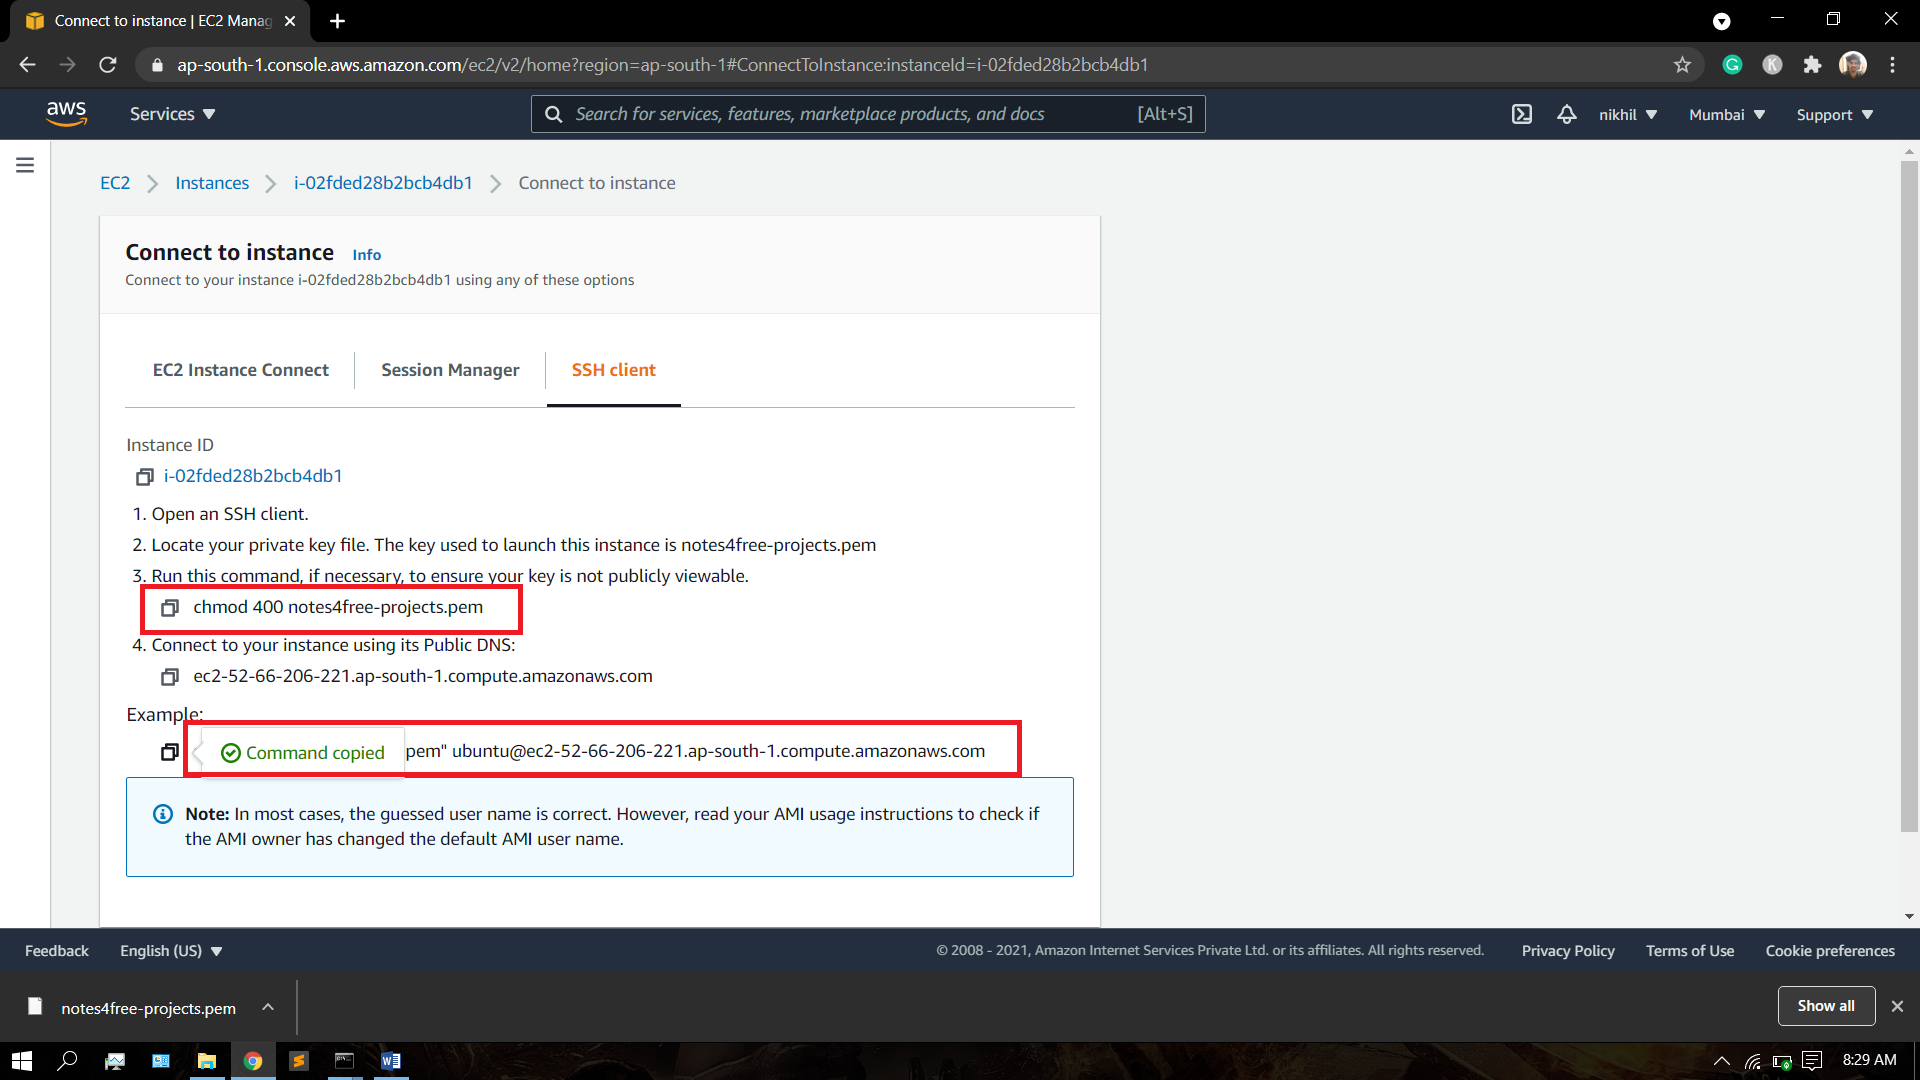
- Open a terminal window and update the permissions of the private key file with the command $ chmod 400 <path-to-key-file> e.g. $ chmod 400 ~/Downloads/my-aws-key.pem , the key must not be publicly viewable for SSH to work.
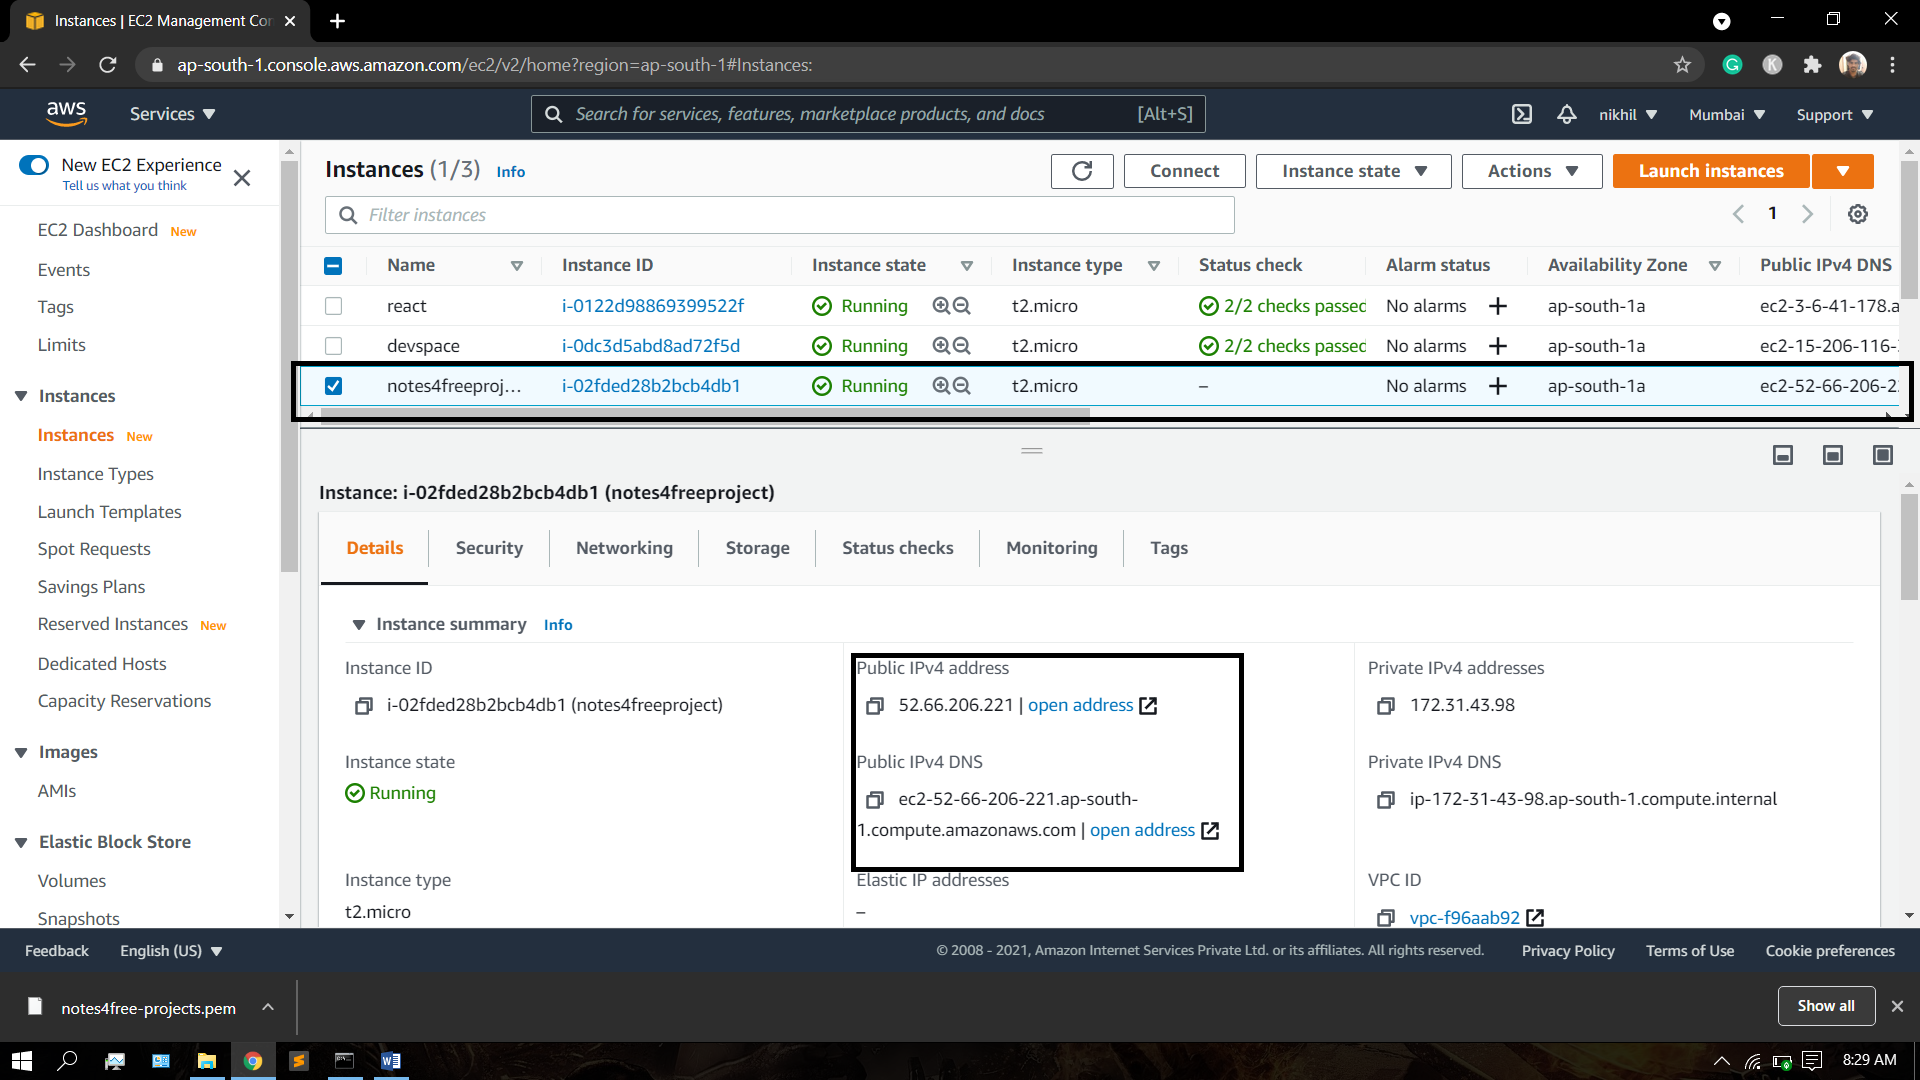
- Copy the "Public DNS (IPv4)" property from the instance description tab in the AWS Console, then connect to the instance from the terminal window with the command ssh -i <path-to-key-file> ubuntu@<domain name> e.g. $ ssh -i ~/Downloads/my-aws-key.pem [email protected]
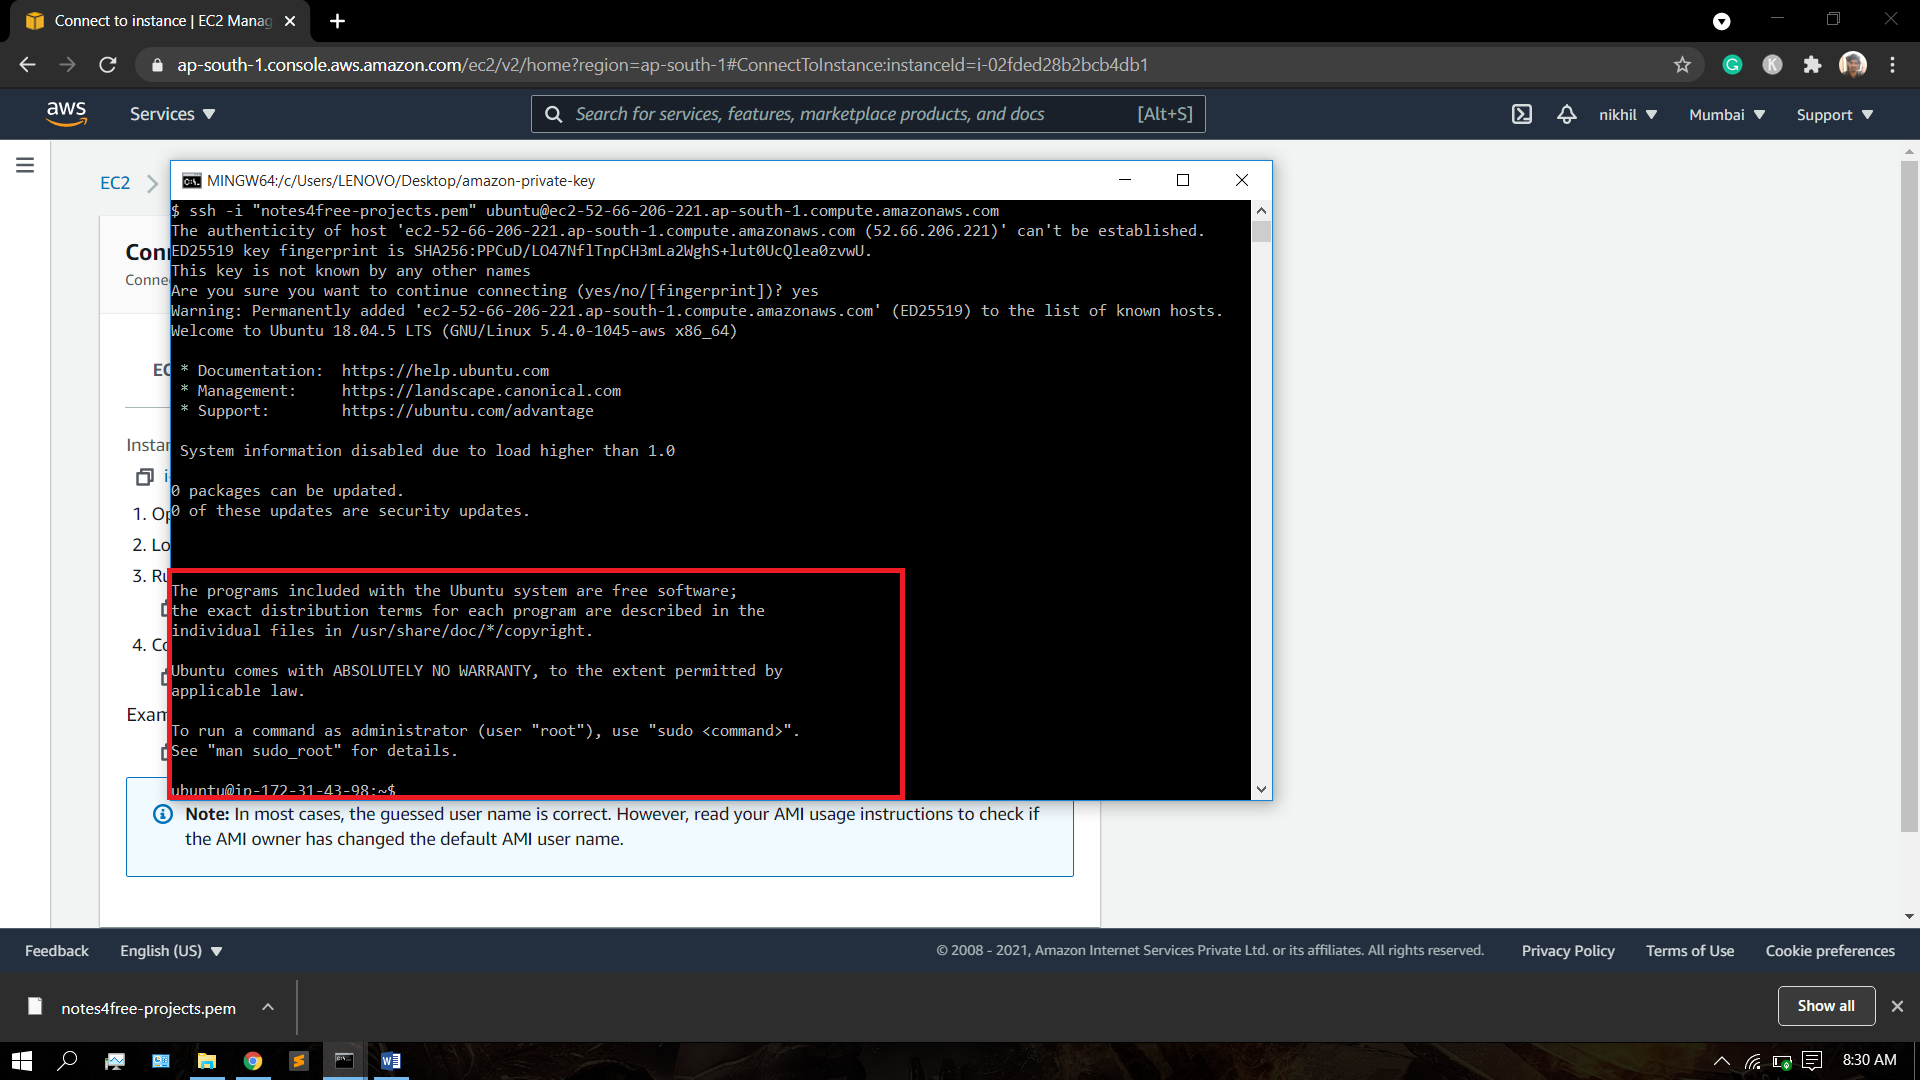
- Enter yes to the prompt "Are you sure you want to continue connecting (yes/no)?" to add the URL to your list of known hosts.
1. Open in a window where you contained the private key value.
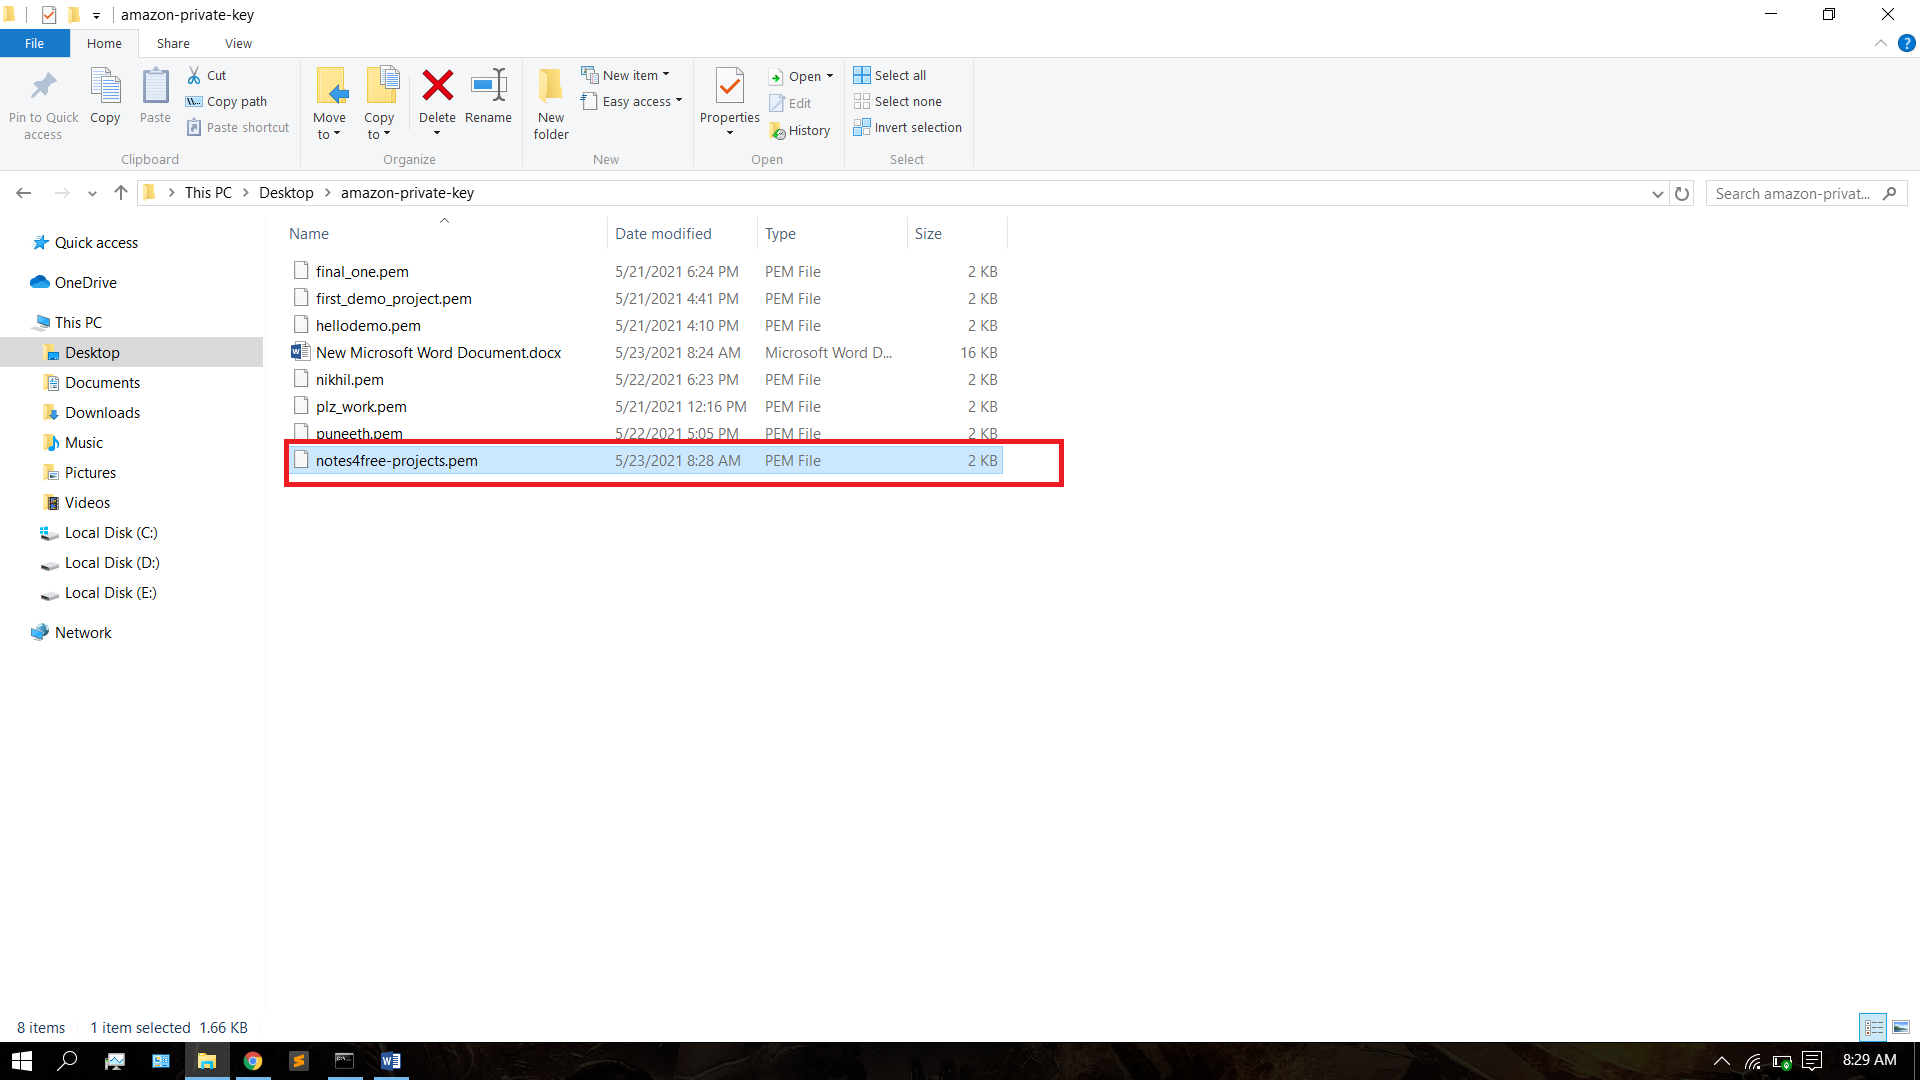
2. Connect to instance - check the instance and click on connect button in the top left where you find the ssh connection to ubuntu os.
3. open git bash in the folder and connect to AWS ubuntu using ssh.
Step3: Cloning the projects in the ubuntu os in amazon ec2.
Clone the Node.js + MongoDB API project into the ubuntu directory with the command
sudo git clone https://github.com/EsC369/DevSpace20.git
Commands should follow and type this command in ubuntu amazon ec2
sudo apt-get update sudo git clone <project_name>
Step 4: Setup server with Node.js + MongoDB in amazon ec2 ubuntu server.
Option 1 - How to Install Nodejs On Ubuntu 20.04
Click here to install Nodejs on Ubuntu server How to Install NodeJS on Ununtu 18.04/20.04
sudo apt update sudo apt install nodejs node -v sudo apt install npm
Option 2- Another way to Installing Node.js with Apt Using a NodeSource PPA
cd ~ curl -sL https://deb.nodesource.com/setup_16.x -o nodesource_setup.sh nano nodesource_setup.sh sudo bash nodesource_setup.sh sudo apt install nodejs node -v
Option 3- Installing Node Using the Node Version Manager
curl -o- https://raw.githubusercontent.com/nvm-sh/nvm/v0.38.0/install.sh
curl -o- https://raw.githubusercontent.com/nvm-sh/nvm/v0.38.0/install.sh | bash
source ~/.bashrc
nvm list-remote
nvm install v14.10.0 (enter version name)
nvm list
How to Install MongoDB On Ubuntu 20.04
wget -qO - https://www.mongodb.org/static/pgp/server-5.0.asc | sudo apt-key add -
or if this not work try this command to install
sudo apt-get install gnupg
wget -qO - https://www.mongodb.org/static/pgp/server-5.0.asc | sudo apt-key add -
echo "deb [ arch=amd64,arm64 ] https://repo.mongodb.org/apt/ubuntu focal/mongodb-org/5.0 multiverse" | sudo tee /etc/apt/sources.list.d/mongodb-org-5.0.list
sudo apt-get update
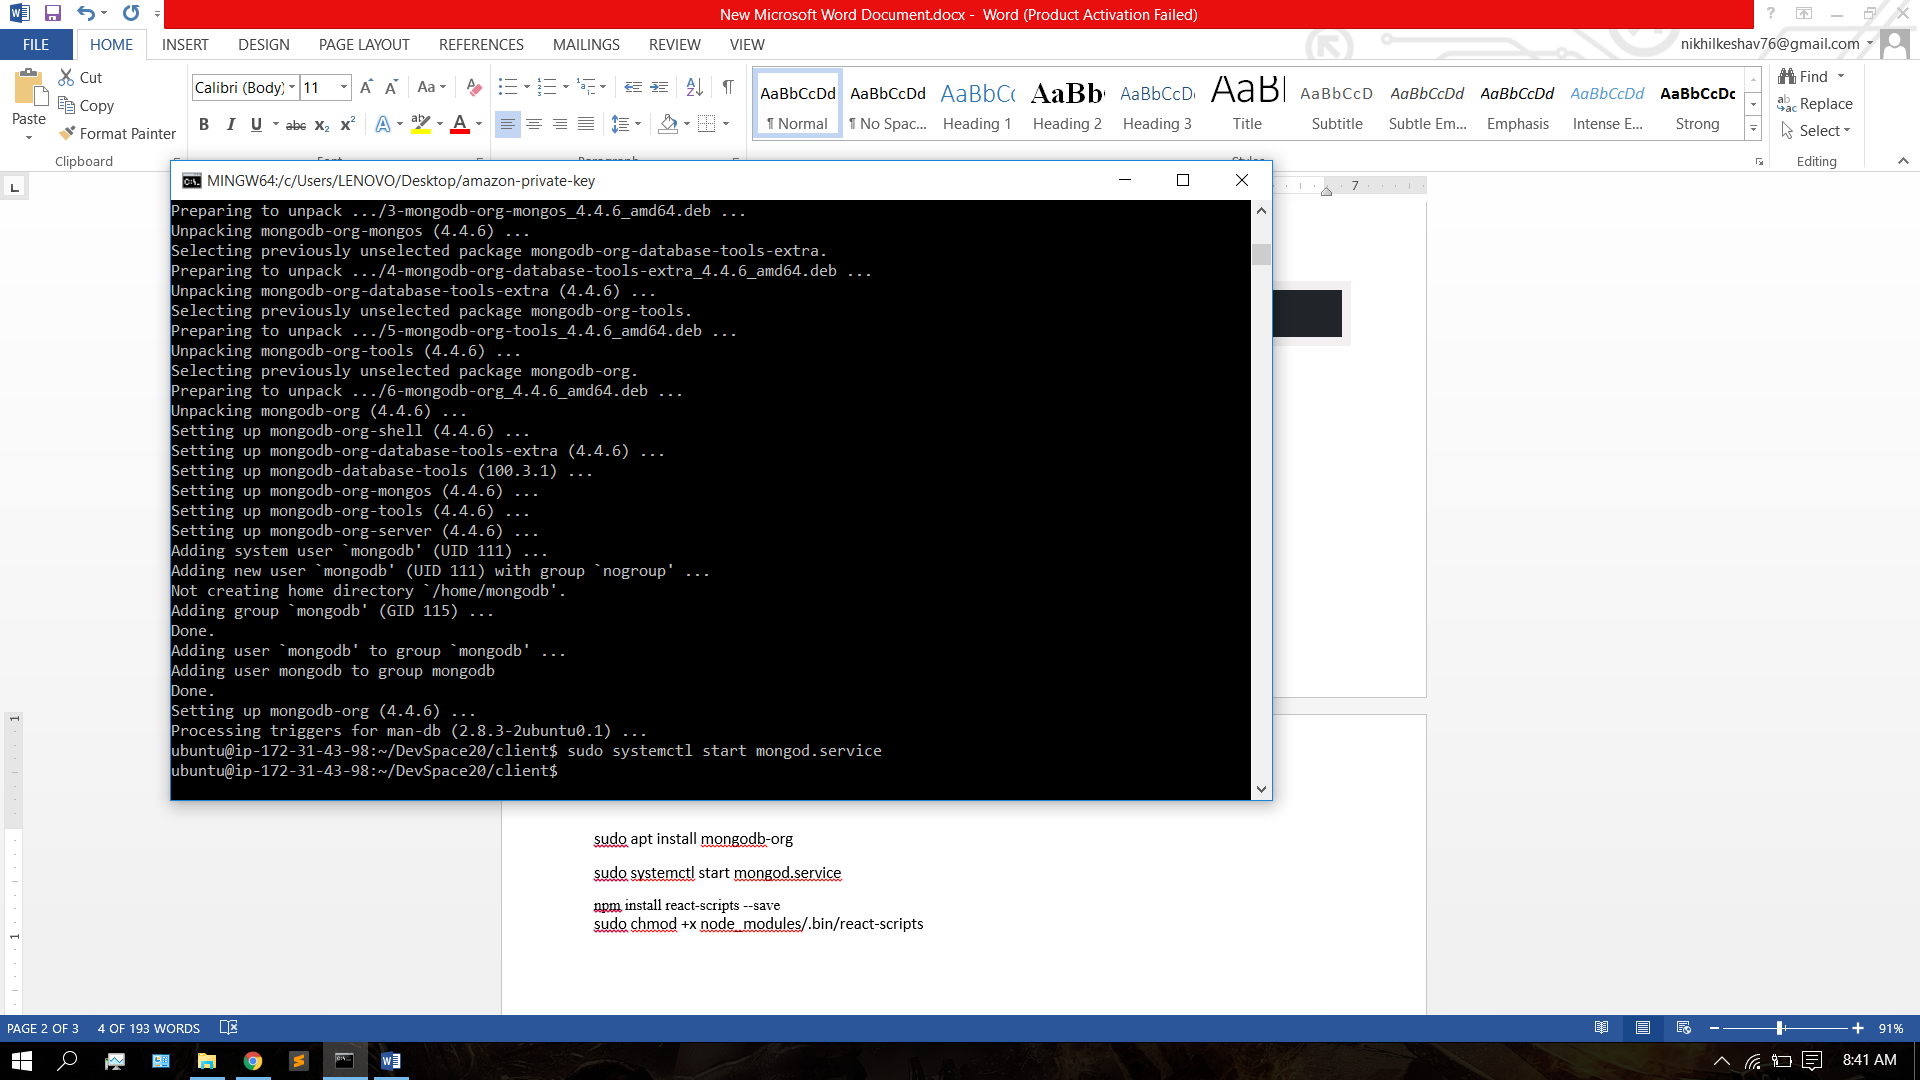
sudo apt-get install -y mongodb-org
Run MongoDB Community Edition
sudo systemctl start mongod
sudo systemctl status mongod
Optional Commands
sudo systemctl stop mongod
sudo systemctl enable mongod
sudo systemctl restart mongod
mongosh
Uninstall MongoDB Community Edition
To completely remove MongoDB from a system, you must remove the MongoDB applications themselves, the configuration files, and any directories containing data and logs. The following section guides you through the necessary steps.
sudo service mongod stop sudo apt-get purge mongodb-org* sudo rm -r /var/log/mongodb sudo rm -r /var/lib/mongodb
How To Installing PM2 on Ubuntu 20.04
Next let’s install PM2, a process manager for Node.js applications. PM2 makes it possible to daemonize applications so that they will run in the background as a service.
Use npm to install the latest version of PM2 on your server:
sudo npm install pm2@latest -g pm2 start hello.js
Step 5: Setup and install all the packages in the clone project in ec2.
1. Install packages on server-side
cd <repo name> sudo npm install
2. install packages on the client-side
cd <client-folder> sudo npm install sudo npm run build
If you face any error in client permission denied error
sudo chmod +x node_modules/.bin/react-scripts
and start the build again
sudo npm start
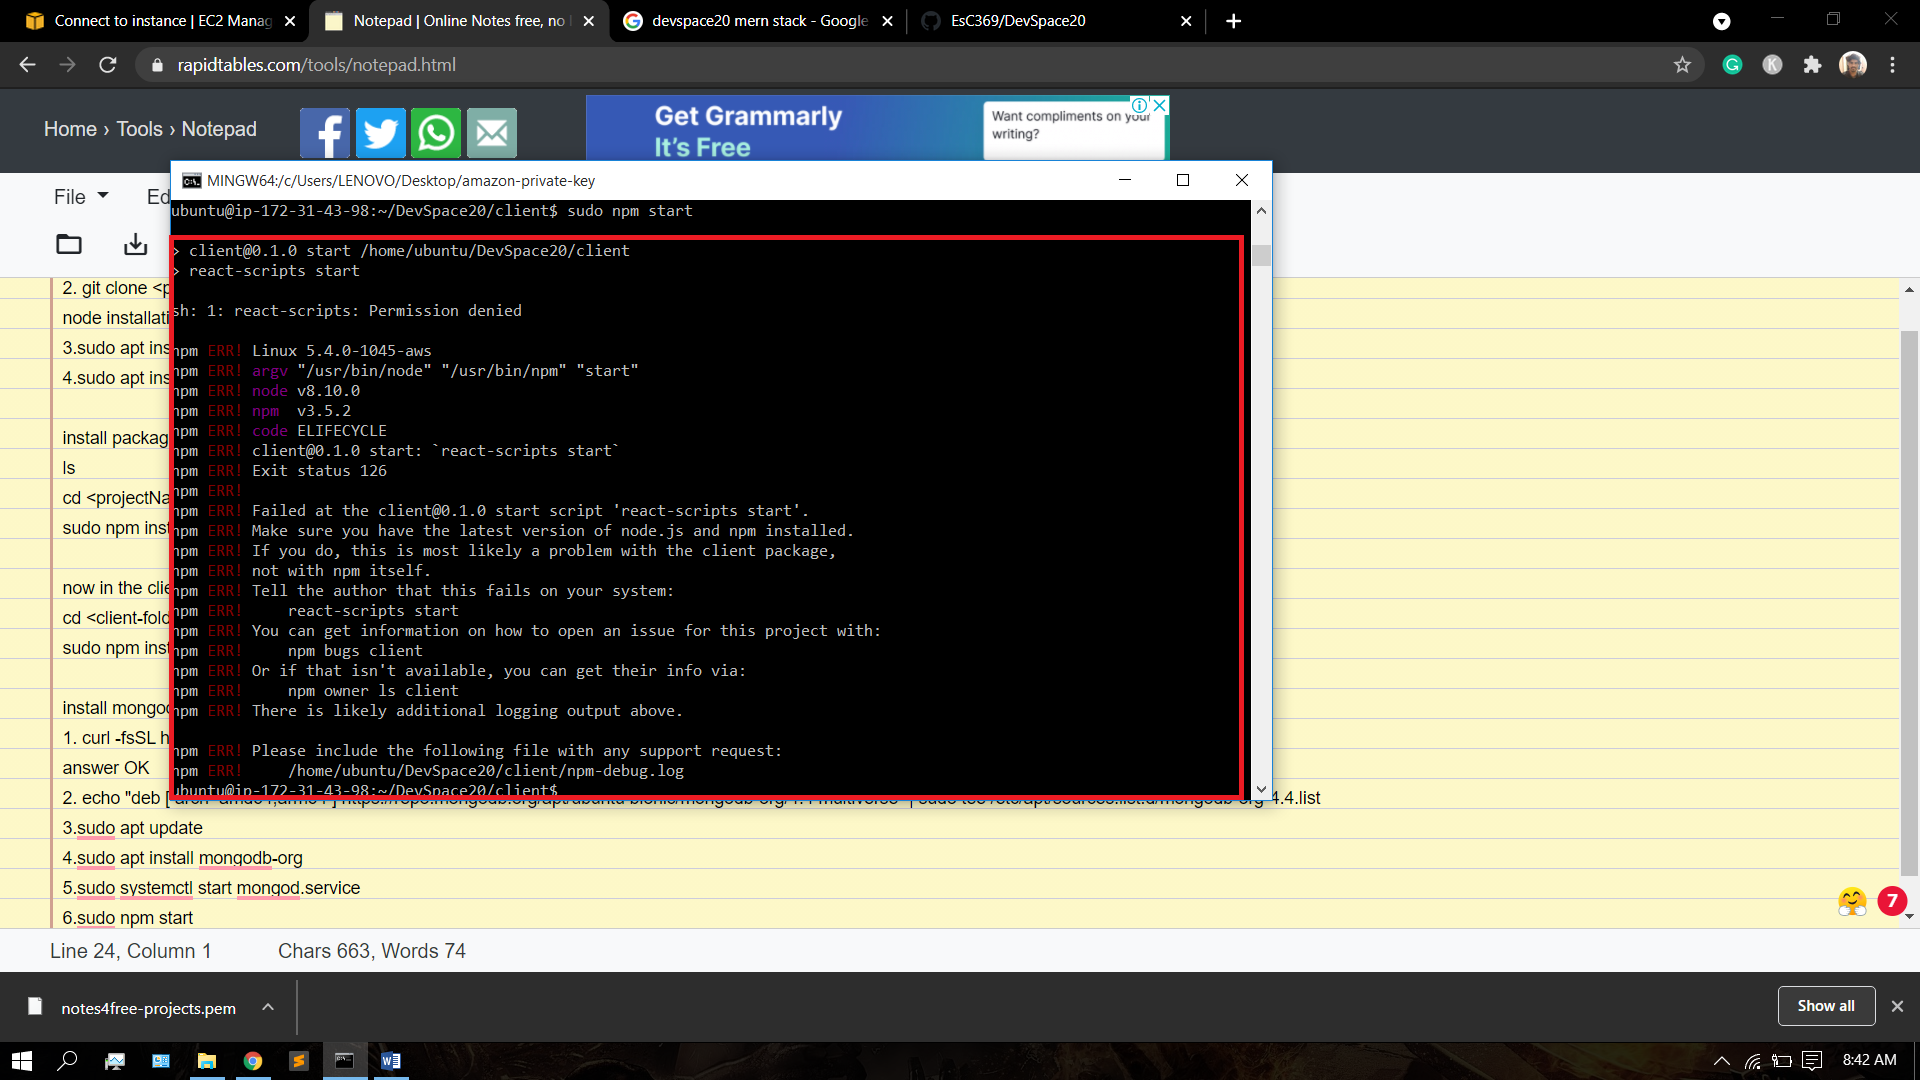
Step 6: Change proxy server in server.js in the ubuntu server.
cd <client_foldername> sudo nano package.json
change proxy server URL into http://127.0.0.1:5000 and click ctrl+x - Y - enter
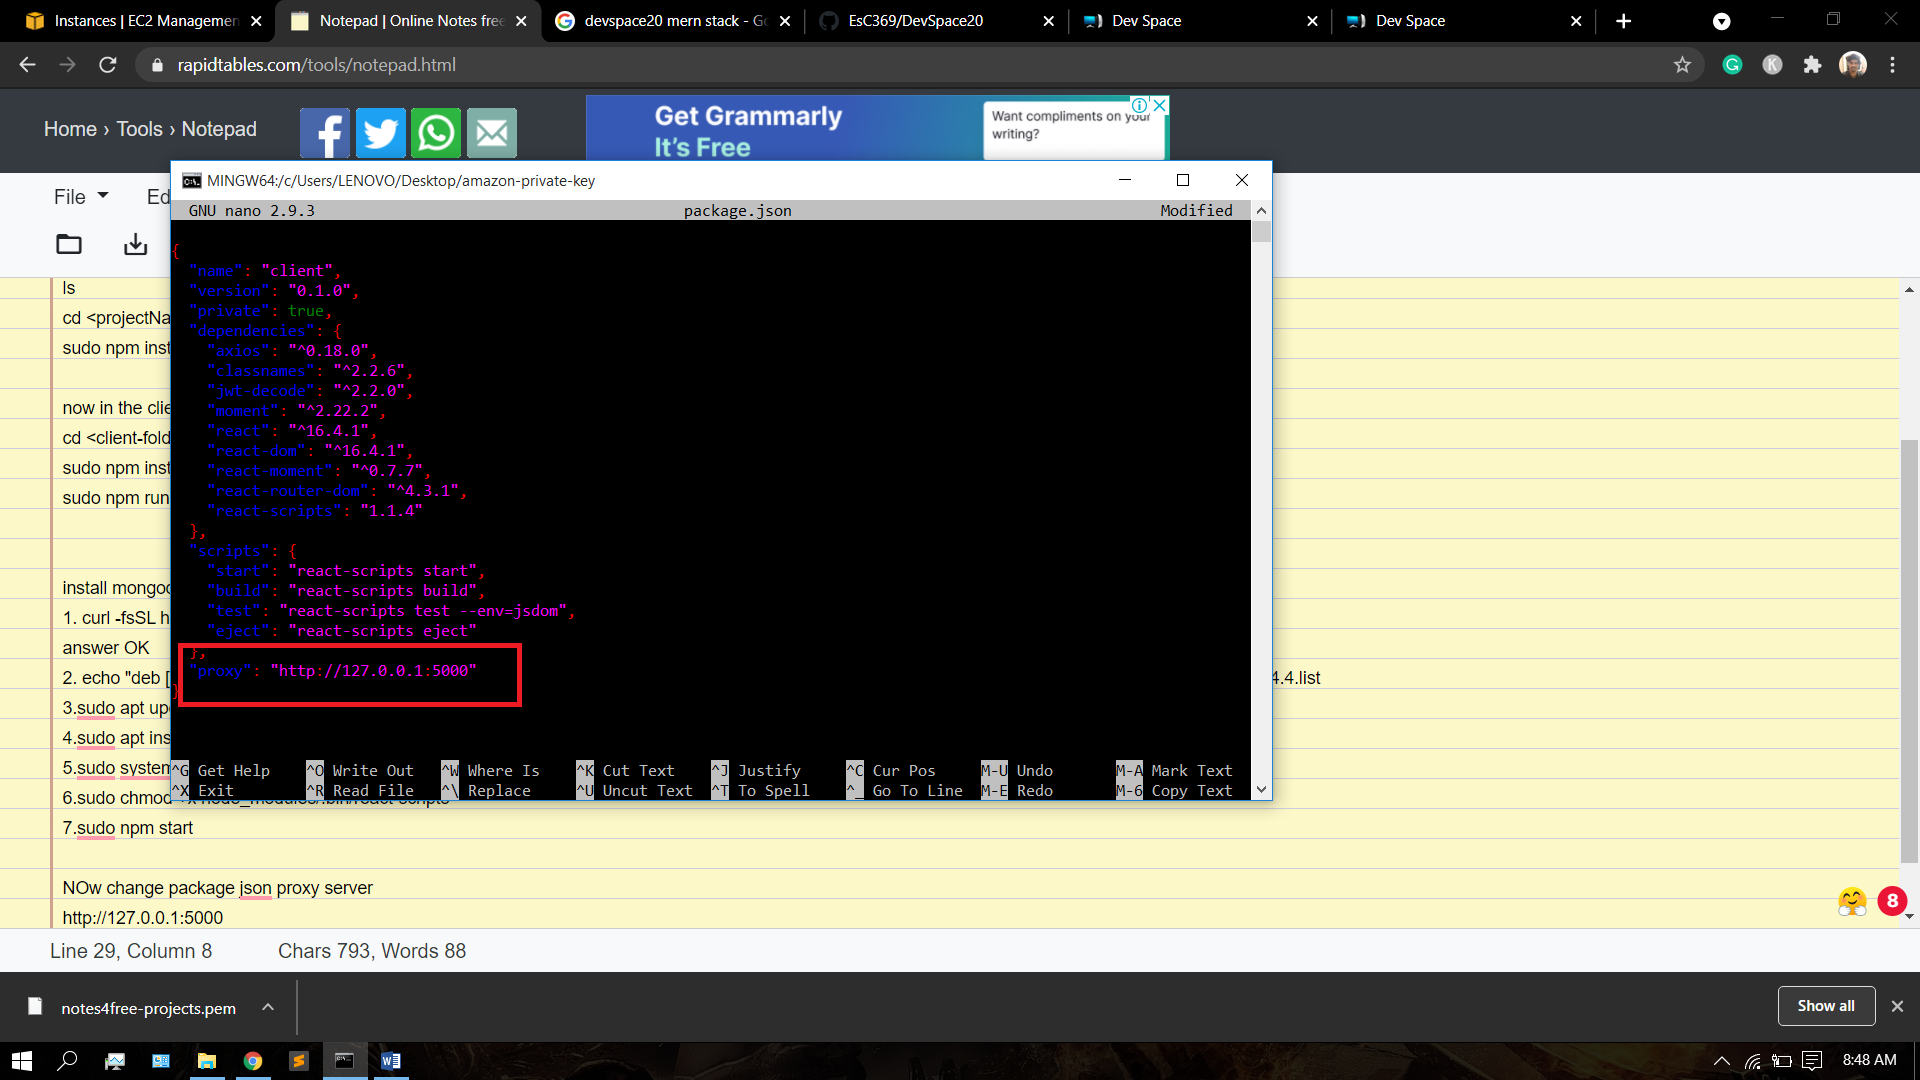
Step 7: install pm2 and run the pm2 in both server and client in AWS ec2
PM2 is a daemon process manager that will help you manage and keep your application online. Getting started with PM2 is straightforward, it is offered as a simple and intuitive CLI, installable via NPM.
sudo npm install -g pm2
Start Run pm2 in server Side of the Mern Stack
cd <repo_name> pm2 start server.js
Start Run pm2 in client of the Mern Stack
cd <client_folder> pm2 start --name <repo_name> npm -- start
or
pm2 start "npm start"
TO STOP PM2
pm2 list pm2 stop 0 (0 means pm2 is running id)
Managing application state in pm2 and this is optional is simple here are the commands:
sudo pm2 restart app_name sudo pm2 reload app_name sudo pm2 stop app_name sudo pm2 delete app_name
Step 8: Test your new MERN Stack application running on AWS
- Enter the hostname of your AWS EC2 instance in a browser to access and test your new MERN stack application.
- The hostname is the "Public DNS (IPv4)" property located on the instance description tab in the AWS Console.
- open the public IP in the instance and with port number http:// 52.66.206.221 :3000 and you will get.
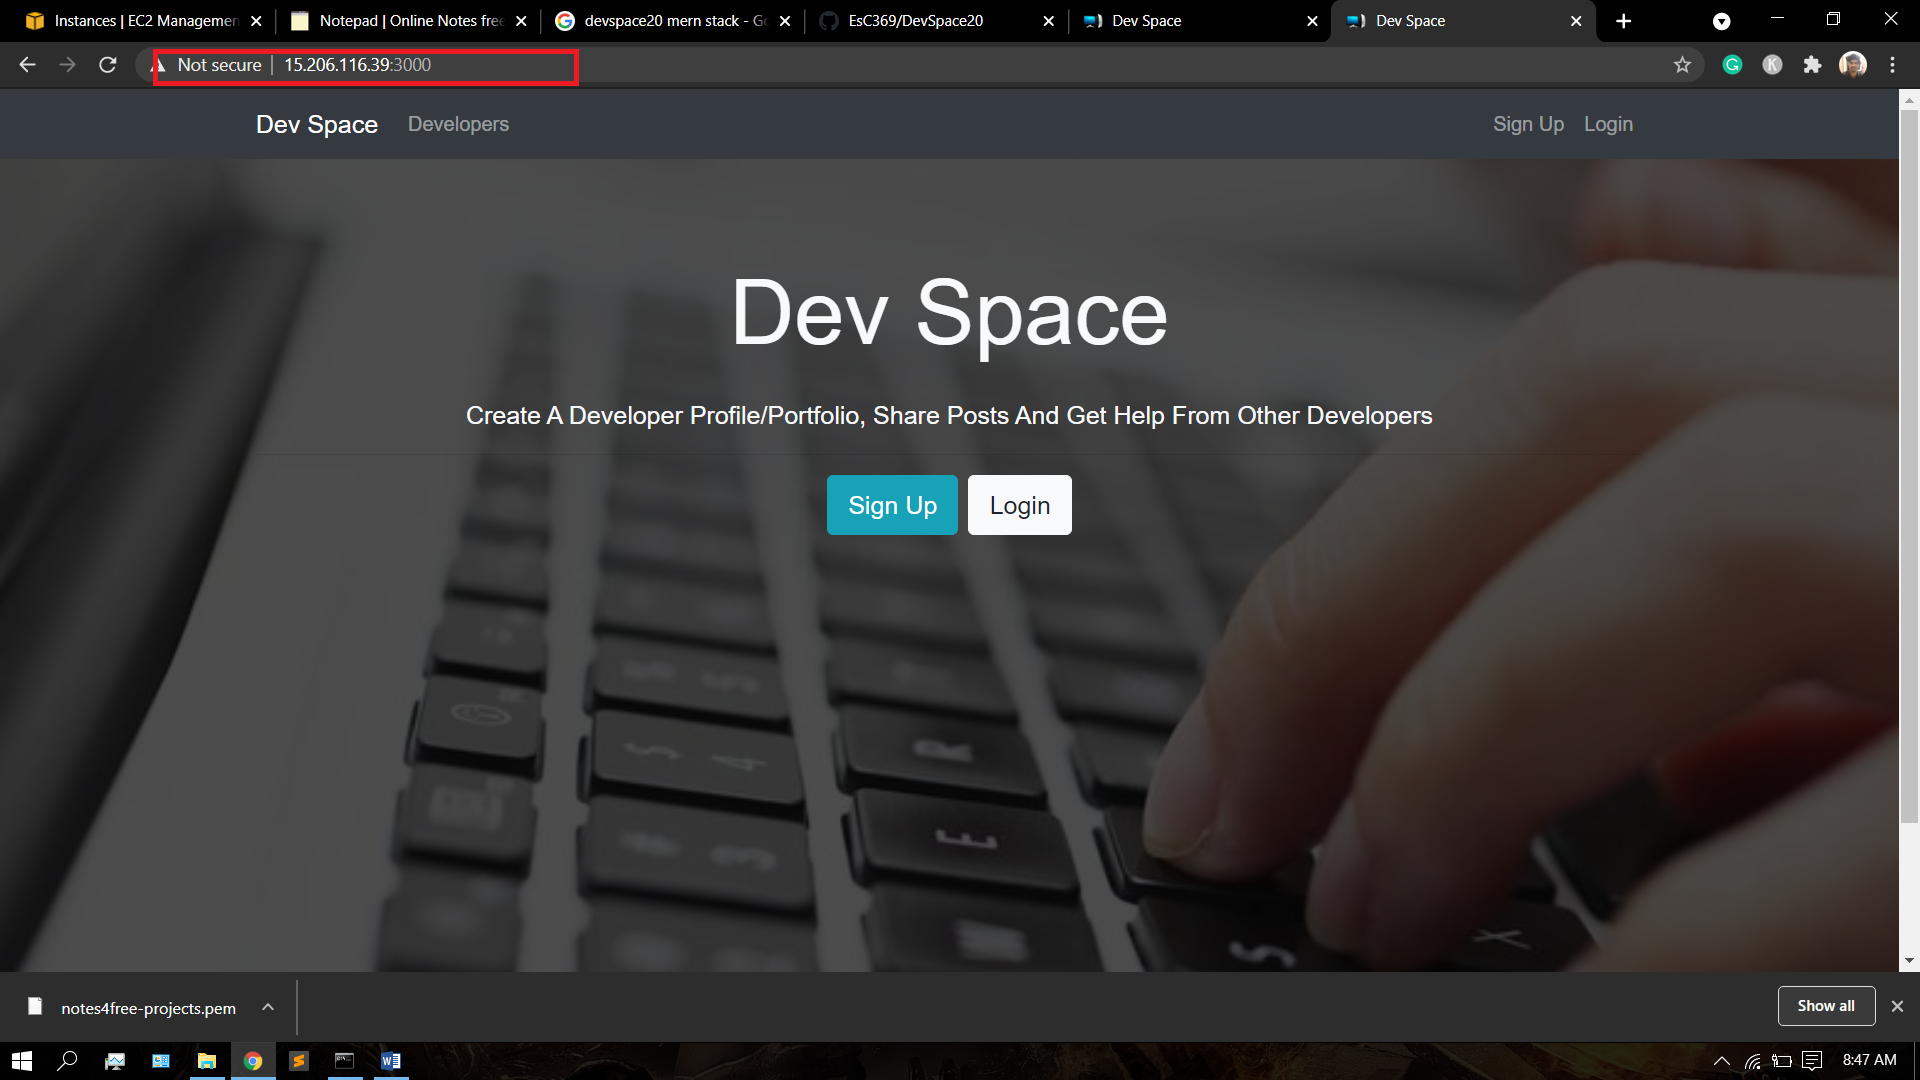
Step 9: Setting Up Nginx as a Reverse Proxy Server On MERN Applications:
Your application is up and running on localhost, but you need to make it accessible to your users. For this, we will use the Nginx web server as a reverse proxy.
You put up your Nginx settings in the /etc/nginx/sites-available/notes2free.com a file in the required instruction. To edit this file, go to:
sudo nano /etc/nginx/sites-available/notes2free.com
You should already have a location/block within the server block. The following configuration should be used to replace the contents of that block. Update the highlighted area to the correct port number if your application is set to listen on a different port:
server { ... location / { proxy_pass http://localhost:3000; proxy_http_version 1.1; proxy_set_header Upgrade $http_upgrade; proxy_set_header Connection 'upgrade'; proxy_set_header Host $host; proxy_cache_bypass $http_upgrade; } ... }
This tells the server to reply to requests from the root directory. Assuming our server is available at notes2free.com, a web browser request to https://example.com/ would be sent to hello.js, which is listening on port 3000 at localhost.
To enable access to other applications on the same server, you can add other location blocks to the same server block. If you had another Node.js application running on port 3001, for example, you might use this location block to allow access to it via https://notes2free.com/app2:
server { ... location /app2 { proxy_pass http://localhost:3001; proxy_http_version 1.1; proxy_set_header Upgrade $http_upgrade; proxy_set_header Connection 'upgrade'; proxy_set_header Host $host; proxy_cache_bypass $http_upgrade; } ... }
Once you are done adding the location blocks for your applications, save the file and exit your editor.
Make sure you didn’t introduce any syntax errors by typing:
sudo nginx -t
Restart Nginx:
sudo systemctl restart nginx
If your Node.js application is up and running, and your application and Nginx configurations are proper, you should be able to access it using the Nginx reverse proxy now. Try it out by going to the URL of your server (its public IP address or domain name).
The page will open with the public IP and MongoDB and reactjs is connected with each other with the help of pm2, and the MERN application works good in the public IP and link this public IP to the domain name.
